Screenshot and asset upload
With App Store Manager, app screenshots can be uploaded and transferred very easily. The screenshot upload works for all supported languages.
In addition, Google Play Console icons and feature graphics are also supported.
The upload process can be divided into four steps:
Creation
Export
Provisioning
Transfer and Upload
Creation
Create your app screenshots in the tool of your choice. This can be done in appropriate graphics applications to various online tools. The latter saves time, as they are tailored to creating store-compliant images. A list of tools can be found here.
Export
Export your app screenshots and package them in our template (available from the App Store Manager “Import from Google Drive” page). Use either the iOS or Android template. The structure is to be kept.
Add the screenshots to the appropriate folder. Note the language and also the resolution of the screenshot
For App Store Connect, the images have to be named from 1.png to 10.png (or .jpg)
For Google Play Console, they have to be named 1.png to 8.png (or .jpg)
Unnecessary images and languages can be deleted from the template
Finally, the folder structure is to be packed into a ZIP archive
You don’t have to provide the maximum of images – thus, 3 is the minimum per iOS device and 2 for Android resolutions
Icons and feature graphics can have any file name, but must be in the dedicated folders
Provisioning
The App Store Manager provides two options for submitting the ZIP archive with the included images. You can either upload the file to Google Drive and paste the link into the App Store Manager, or upload the file directly to the App Store Manager itself. The second option is currently in beta and available only to selected subscribers (if you are interested, please feel free to contact us).
Provision directly to App Store Manager
As a member of our beta test, you can upload the ZIP archive directly. Navigate to "App Assets" and select the "Direct Upload" tab. Choose "Upload file" and add your ZIP archive. Once the file is uploaded, you can either start the upload to the stores or prepare the upload for later.
Files will be stored in App Store Manager for 30 days and then automatically deleted. Of course, this does not affect store listings.

Provision through Google Drive
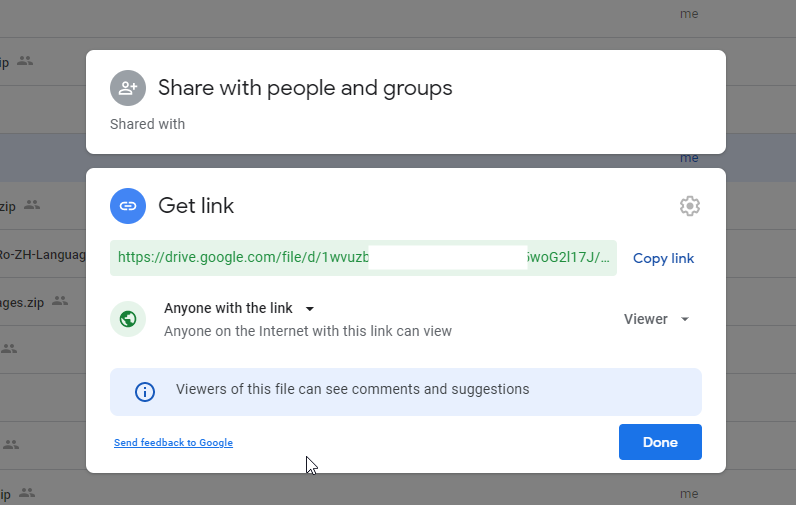
You must upload the created archive to Google Drive (exclusively). Once the upload is done, a link to the archive can be made on Google. In doing so, the suitable “Viewer” is to be assigned.
The link will be provided in the App Store Manager afterward. Now the upload can succeed.

Locate the app package in the App Store Manager. Under "App Assets," insert the link you created earlier into the designated field.

Upload
Click "Upload" and enter your credentials or select the stored ones and click upload. This can take up to 1.5 hours, depending on the volume or the number of languages and images. The duration also depends on the general system load by other users.
The log and the loading spinner signal the progress. Business customers have the option of prioritizing and thus accelerated processing.
Once the process is complete, all your images are submitted to the store.

Access permissions
The App Store Manager requires the following access rights to work correctly for Google Play Console:
View app information (read-only) – to access and download metadata for import
Edit and delete draft apps – to upload metadata and screenshots
Manage store presence – to upload metadata and screenshots
For App Store Connect, you have to configure API access.
Last updated